Planning Your Northern Lights Adventure: Essential Tips for an Unforgettable Trip
Chasing the northern lights is a dream for many travelers. To make the most of your aurora adventure, careful planning is essential. Here’s a comprehensive guide to help you navigate through the critical aspects of planning a trip to witness and photograph the mesmerizing northern lights.
1- Solar Max of Solar Cycle 25: A Prime Time for Aurora Viewing
The solar cycle, which spans approximately 11 years, influences the intensity of the northern lights. We are currently in Solar Cycle 25, expected to peak—reaching solar maximum—between 2024 and 2025. This period is marked by increased sunspots, solar flares, and geomagnetic storms, all contributing to more frequent and intense auroras.
- Sunspots: Dark areas on the sun’s surface that indicate higher auroral activity.
- Solar Flares: Explosions on the sun’s surface that boost aurora activity.
- Geomagnetic Storms: Disturbances in the Earth’s magnetic field caused by solar wind, leading to vibrant auroras.
Here is a link to Space Weather to check solar activity and for news on aurora borealis.
2- When to Go: Choosing the Best Time for Aurora Viewing
The northern lights are the most visible from September to March, with each month offering unique viewing conditions. Here are key factors to consider when planning your trip:
- Night Time: Longer nights offer more opportunities to see the auroras.
- Clear Skies: Ensure minimal cloud cover for the best visibility.
- Dark Skies: Avoid nights with a full moon for brightest auroras.
- Temperature: Consider your comfort, as temperatures can range from above freezing in September to extremely cold in February.
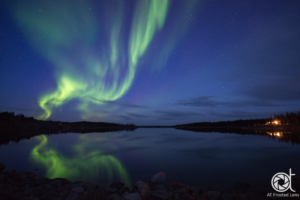
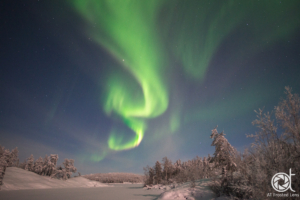
- Photography: Decide what kind of images you want; September is great for reflections in lakes, while February and March offer frozen landscapes.
In Yellowknife, Canada, September typically has clearer skies compared to January, and temperatures are significantly milder, making it easier to stay outside for longer periods.
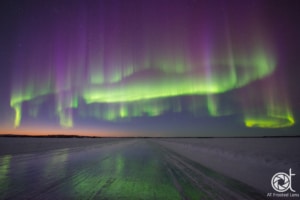
Northern Lights reflecting in lake in late September.
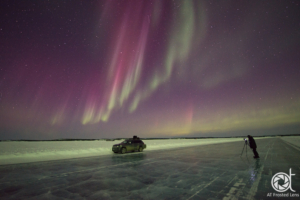
NL over frozen landscape lit by full moon in February.
3- Where to Go: Top Locations for Aurora Viewing
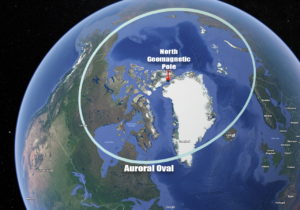
To see the northern lights, head to locations along the aurora oval, a ring around the magnetic poles where auroras are most frequent. Here are some top destinations in North America and Europe.
North America:
- Alaska, USA: Accessible with well-developed tourism facilities.
- Yellowknife, Canada: Accessible and known for frequent aurora sightings, even during low geomagnetic activity, and a tourism industry catering to aurora viewers.
- Churchill, Manitoba, Canada: Famous for its polar bears and northern lights.
Europe:
- Tromsø, Norway: Combines stunning scenery with reliable aurora displays.
- Lapland, Finland: Offers a magical experience with opportunities to learn about Sami culture.
- Reykjavik, Iceland: Easy access with vibrant city life and good aurora viewing spots, BUT requires higher geomagnetic activity and often cloudy.
Considerations:
- Flights: Look into flight options and costs to your destination.
- Accommodation: Choose places that cater to aurora watchers with late-night amenities or where you can be totally independent.
- Tourist Infrastructure: Opt for locations with strong tourism services to enhance your experience – tours, taxis, car rental…
4- Tour of Self-Drive: Decide How to Explore
When planning your aurora trip, you can either join a tour or explore on your own with a rental car.
Self-Drive:
- Flexibility: Set your own schedule, explore at your own pace and stay out all night.
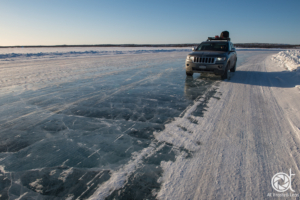
- Adventure: Enjoy the experience of driving on winter roads and ice trails.
- Preparation: Ensure your vehicle is winter-ready and plan routes to known aurora spots during daytime.
Here we went out during daytime to check out the ice road about 60 km outside of town that had just closed to truck traffic, so it was safe to park at night. We are also prepared with extra food, clothing and gas.
Guided Tours:
- Convenience: Benefit from local guides who know the best viewing spots.
- Safety: Rely on professional drivers and well-maintained vehicles in winter conditions.
- Variety: Choose from various tour operators offering different experiences.
Photography Tours:
- Expert Guidance: Photography tours are led by experienced photographers who can offer tips and techniques to capture the perfect shot of the aurora, often in small groups.
- Specialized Equipment: Some photography tours provide specialized equipment, such as tripods and wide-angle lenses, which are essential for capturing the northern lights.
- Unique Locations: Guides often take you to lesser-known spots that provide a unique backdrop for your photos, away from the usual tourist spots, and are more flexible with time spent out.
- Workshops: Some tours include photography workshops, where you can learn about settings, composition, and post-processing techniques to enhance your aurora photos.
Tips:
- In places like Yellowknife, numerous tour operators offer customized experiences, from heated cabins to mobile units chasing the aurora.
- The same aurora borealis display is visible over a wide area, often hundreds of kilometers from one spot. Ensure the location you choose for viewing has safe parking, is away from light pollution and without clouds, and you have a good chance of seeing auroras if they are out.
5- Photographing the Northern Lights: Gear and Tips
Capturing the northern lights requires specific gear and preparation, especially in extreme cold. Here’s what you need to know:
Essential Gear:
- Camera: Use a DSLR or mirrorless camera with manual settings.
- Lens: A wide-angle lens with a fast aperture (f/2.8 or lower) is ideal.
- Tripod: A sturdy tripod keeps your camera steady during long exposures.
- Remote Shutter Release: To avoid camera shake when taking photos.
- Extra Batteries: Cold weather drains batteries quickly; keep spares warm.
- Memory Cards: High-capacity and fast cards for large image files.
- Headlamp: A headlamp with a red light option helps you see without ruining your night vision.
Cold Weather Considerations:
- Dress in Layers: Wear thermal layers, insulated and windproof jackets, hats, gloves, and warm boots.
- Hand Warmers: Keep your hands and camera batteries warm.
- Camera Protection: Use a Camera Parka to guard your gear from frost and condensation, and save battery life.
Tips:
- Know Your Camera: Practice operating your camera in the dark before your trip. Familiarity with your settings will make adjustments easier in the cold.
- Glove-Friendly Gear: Use equipment that can be operated with gloves on.
- Camera Settings: Preset your camera at home to manual focus, manual mode with a high ISO (800-3200), wide-open aperture, and 2-10 second exposure.
- Composition: Most of the action is in the sky! Include foreground elements for added interest in your photos.
Planning a trip to see the northern lights involves careful consideration of various factors. By understanding the solar cycle, choosing the right time and place, deciding how to explore, and preparing your photography gear, you can enhance your chances of witnessing and capturing this stunning natural phenomenon.
Start planning your northern lights adventure today for an experience you’ll never forget!

 Armelle Troussard